Help:Introduction To Editing With VisualEditor
Opening the editor
How to activate editing mode
Toolbar basics
The tools at your disposal
Links and wikilinks
Connect pages up to each other
Publishing changes
Make it so
Creating new articles
Building a page from scratch
Summary
Review of what you've learned
A note about editing on mobile devices: Most Wikipedians prefer to edit from a computer, as the editing interface works better there. You can edit from a mobile device, though. See this page for more information.

VisualEditor is a What You See Is What You Get-style editor for Wikipedia. It's very simple to learn. It is an alternative to the Source editor, the primary editing interface which works more like a plain text file and allows you to directly edit the wiki markup text (wikitext). While VisualEditor is simpler to use, the Source editor can be more effective for some tasks.
This tutorial introduces the basics of using VisualEditor. Full instructions can be found in the VisualEditor user guide. You can enable VisualEditor through the Editing tab of Preferences: At "Editing mode:" select the dropdown "Show me both editing tabs". Then, ensure the "Temporarily disable the visual editor while it is in beta" box is not checked, and simply save your settings.
VisualEditor is still in development and so has some limitations and bugs. Most notably, it is slower to load than editing the source code, and is available for article pages but not talk pages. If you spot any problems, you can leave comments and suggestions at the Feedback page.

Opening VisualEditor
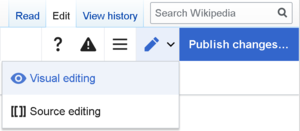
After you've enabled VisualEditor, you can edit any page that uses it by clicking on the "Edit" tab at the top of the page. (A long page may take a few seconds to load.)
You can also open VisualEditor by clicking on the "edit" link on any section of an article. You can also toggle between using VisualEditor and Source Editor whilst editing most pages.
